 Drawing a Skyline R32
Introduction:
Drawing a car can be both exciting and challenging, especially for beginners. The iconic Nissan Skyline R32, with its sleek lines and dynamic design, is a fantastic subject for those looking to delve into the world of automotive art. In this guide, we’ll break down the process step by step, making it accessible for artists of all skill levels.
Materials:
Before we start, gather the necessary materials: a sketchbook, pencils (ranging from 2H to 6B for varied shading), an eraser, and a reference image of the Skyline R32. Having a reference image is crucial for accuracy, as it helps you understand the car’s proportions and details.
Beginner’s Guide to Drawing a Skyline R32
Step 1: Basic Shapes and Proportions
Begin by sketching basic geometric shapes to outline the car‘s proportions. Use ovals for the wheels and a rectangular box for the body. Pay attention to the length of the car, the placement of the wheels, and the overall height. This initial step sets the foundation for your drawing.
Step 2: Define the Body Contours
Refine the basic shapes by adding curves and contours to represent the car’s body. Focus on the major features such as the roofline, windshield, and fenders. Take your time to ensure these lines flow smoothly and capture the Skyline’s distinct silhouette.
 Step 3: Detailing the Front and Rear
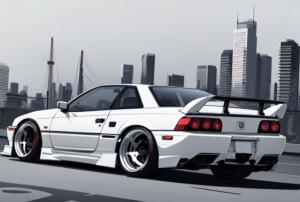
Zoom in on the front and rear sections of the car. Sketch the headlights, grille, and other distinctive features. Pay attention to the Skyline R32’s characteristic pop-up headlights and the details around the rear, including the taillights and bumper. These details contribute to the car’s identity.
Step 4: Wheels and Tires
Define the wheels and tires by adding spokes and tire treads. Ensure that the wheels are properly aligned and proportional to the body. Take your time with this step, as accurate wheel placement is crucial for a realistic representation.
Step 5: Shading and Texturing
Now comes the fun part—adding depth and realism through shading. Identify the light source in your reference image and shade accordingly. Use lighter strokes for areas exposed to light and darker strokes for shadows. Experiment with hatching and cross-hatching techniques to create textures on the car’s surfaces.
Step 6: Refining Details
Go back to the major features and refine them further. Add smaller details like door handles, side mirrors, and any other distinctive elements that contribute to the Skyline R32’s character. Pay attention to symmetry and balance throughout this process.
How to draw a Skyline R32
 Step 7: Final Touches
Take a step back and assess your drawing as a whole. Make any necessary adjustments to ensure a cohesive and well-proportioned representation of the Skyline R32. Erase any unnecessary lines, refine shading, and add final touches to enhance the overall appeal of your artwork.
Conclusion:
Drawing a Skyline R32 as a beginner might seem challenging, but with patience and practice, you’ll uncover the artist within you. For more indepth training on sketching with a pencil, check out “Pencil Drawing Made Easy” Remember to enjoy the process, learn from each attempt, and celebrate your progress. The key to improvement lies in consistent practice and a passion for the art of drawing. Happy sketching!
*This Post Contains Affiliate Links that I make a commission from.